

A team directory, a recipe collection, a portfolio of client projects — none of these fit naturally into WordPress’s default post or page structure. That’s exactly the problem custom post types solve. They let you define entirely new content structures, complete with their own admin menus, URL patterns, and field configurations.
If you’ve been wondering whether your site needs a custom post type, or you already know you need one and just want to figure out the best way to set it up, this guide covers all three practical approaches: writing the code yourself, using the free Custom Post Type UI plugin, and registering CPTs through Advanced Custom Fields. Along the way, you’ll also see how to pair your CPT with custom fields for structured data entry.

Quick Summary (BLUF)
A custom post type (CPT) is a content structure you define in WordPress to hold a specific kind of content — anything from products to team members to events. WordPress ships with five built-in post types (post, page, attachment, revision, menu). Anything beyond that is a custom post type.
Here’s how the three main approaches compare at a glance:
| Your situation | Best method |
|---|---|
| Non-developer, no coding experience | Custom Post Type UI (free plugin) |
| Developer wanting full control | register_post_type() in PHP |
| Already using ACF on your site | ACF Post Types (built into ACF free) |
| Headless WordPress or REST API use | Code with show_in_rest => true |
Key rule: Regardless of method, always register CPTs in a plugin — not a theme — so your content structure survives a theme change.
What Is a Custom Post Type in WordPress?
WordPress stores everything as a “post” in its database. Blog entries, pages, uploaded images, navigation menus — they’re all posts with different post type values. Custom post types follow the same pattern but use a value you define.
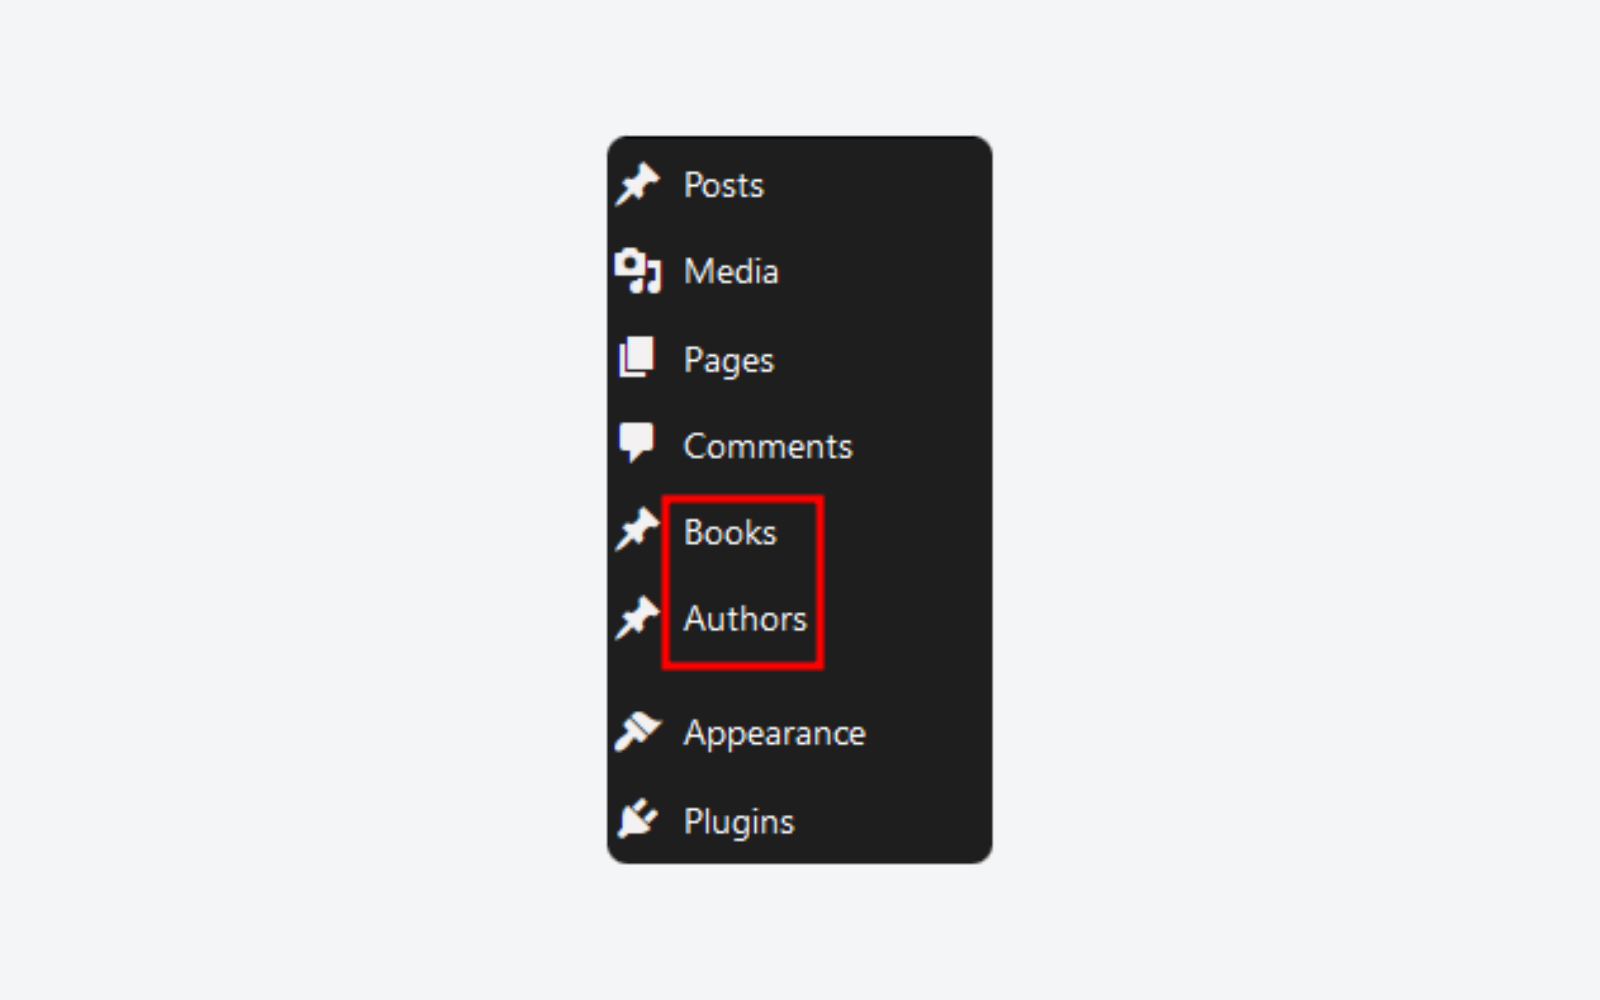
Say you run a small business site and want to showcase past projects. You could create individual pages for each one, but then you’d be manually managing dozens of separate pages with no consistent structure. A “Projects” custom post type gives each project its own entry, its own admin screen, and its own URL — all managed through a familiar interface that works like the standard Posts admin panel.
Custom post types were added in WordPress 3.0 and have been a core feature ever since. They’re used under the hood by most major plugins — WooCommerce products, events in The Events Calendar, and portfolio items in many themes are all custom post types.
Do You Actually Need a Custom Post Type?
Not every content problem needs a custom post type. Before registering one, run through this checklist:
| Question | If yes, leans toward CPT |
|---|---|
| Is the content non-chronological (not a news feed or blog)? | ✅ |
| Does it need its own URL structure separate from /blog/? | ✅ |
| Does it need different fields than a standard post? | ✅ |
| Will you have 10 or more entries over time? | ✅ |
| Do you want it in a separate admin menu section? | ✅ |
If you answer yes to three or more of these, a custom post type is likely the right call. If you only need a couple of one-off pages, a regular page with a custom template is simpler.

Method 1: Create a Custom Post Type with Code
Registering a CPT with PHP gives you complete control over every argument. This is the approach developers use when building plugins or client sites where precision matters.
The core function is register_post_type(), called on the init action hook. Here’s a minimal working example for a “Projects” post type:
function my_register_projects_cpt() {
    $args = array(
        'labels' => array(
            'name'          => 'Projects',
            'singular_name' => 'Project',
            'menu_name'     => 'Projects',
            'add_new_item'  => 'Add New Project',
            'edit_item'     => 'Edit Project',
        ),
        'public'       => true,
        'has_archive'  => true,
        'show_in_rest' => true,
        'supports'     => array( 'title', 'editor', 'thumbnail', 'excerpt' ),
        'menu_icon'    => 'dashicons-portfolio',
        'rewrite'      => array( 'slug' => 'projects' ),
    );
    register_post_type( 'my_project', $args );
}
add_action( 'init', 'my_register_projects_cpt' );
You can add this code to a custom plugin (recommended) or to your child theme’s functions.php file as a starting point.
Key Arguments Explained in Plain English
The register_post_type() function accepts a large array of arguments. These are the ones you’ll actually use on most projects:
| Argument | What it does | Common value |
|---|---|---|
public |
Makes the CPT visible to users and in the admin | true |
labels |
Sets the admin UI text (menu name, button labels) | Array of strings |
has_archive |
Creates a listing page at /your-slug/ | true |
supports |
Which editor features appear (title, editor, thumbnail, etc.) | ['title','editor','thumbnail'] |
show_in_rest |
Enables Gutenberg block editor + REST API access | true |
menu_icon |
The icon in the left admin sidebar | 'dashicons-portfolio' |
rewrite |
Controls the permalink slug | ['slug' => 'projects'] |
hierarchical |
Set to true for page-like parent/child structure | false |
One argument worth highlighting: show_in_rest. Setting it to true is required if you want the Gutenberg block editor to work for this post type. It also exposes the CPT via the WordPress REST API, which is essential for headless WordPress setups or automation tools like Zapier and Make.
Naming Best Practices
The post type identifier (the first argument to register_post_type()) has a hard limit of 20 characters — this comes from the database column size. Keep identifiers short and prefix them with your plugin or project name to avoid conflicts with other plugins.
- ✅ Good:
acme_project,mbc_recipe - ❌ Too generic:
project,product(likely to conflict) - ❌ Reserved prefix: anything starting with
wp_
Custom Slug and URL Structure
By default, your CPT uses its identifier as the URL slug. A post type registered as my_project would produce URLs like /my_project/project-name/. The rewrite argument lets you change that:
'rewrite' => array( 'slug' => 'projects' )This produces cleaner URLs like /projects/project-name/. After changing slugs, flush your permalink settings by going to Settings > Permalinks and clicking Save.
Method 2: Custom Post Type UI Plugin (No Code)
Most site owners don’t need to touch PHP to create a custom post type. The Custom Post Type UI plugin by WebDevStudios is the most widely used tool for this, with over 1 million active installations and a 4.6/5 rating on WordPress.org (as of January 2026, version 1.18.3). It’s completely free. If you’re new to extending WordPress this way, our WordPress plugins guide covers the basics of finding and evaluating plugins like this one.
After installing and activating CPT UI, you’ll find a new “CPT UI” menu in your WordPress admin. Here’s how the basic workflow goes:
- Go to CPT UI > Add/Edit Post Types
- Enter a Post Type Slug (e.g.,
project) — keep it lowercase, no spaces - Fill in the Plural Label (e.g., “Projects”) and Singular Label (e.g., “Project”)
- Under Settings, toggle “Public” to True
- Enable “Has Archive” if you want a listing page
- Under Additional Labels, customize the admin UI text as needed
- Under Supports, check the features you want (Title, Editor, Featured Image, etc.)
- Click Add Post Type
The plugin also has an import/export feature — useful when you’re building on a development server and need to move your CPT configuration to a live site without recreating everything by hand.
One thing to understand: CPT UI doesn’t include custom fields. Once you’ve set up your post type, you’ll need a separate tool — ACF, Pods, or Meta Box — to add extra data fields beyond the standard title and content editor. This is a common workflow: CPT UI for structure, ACF for fields.
Method 3: ACF Post Types (Visual Builder)
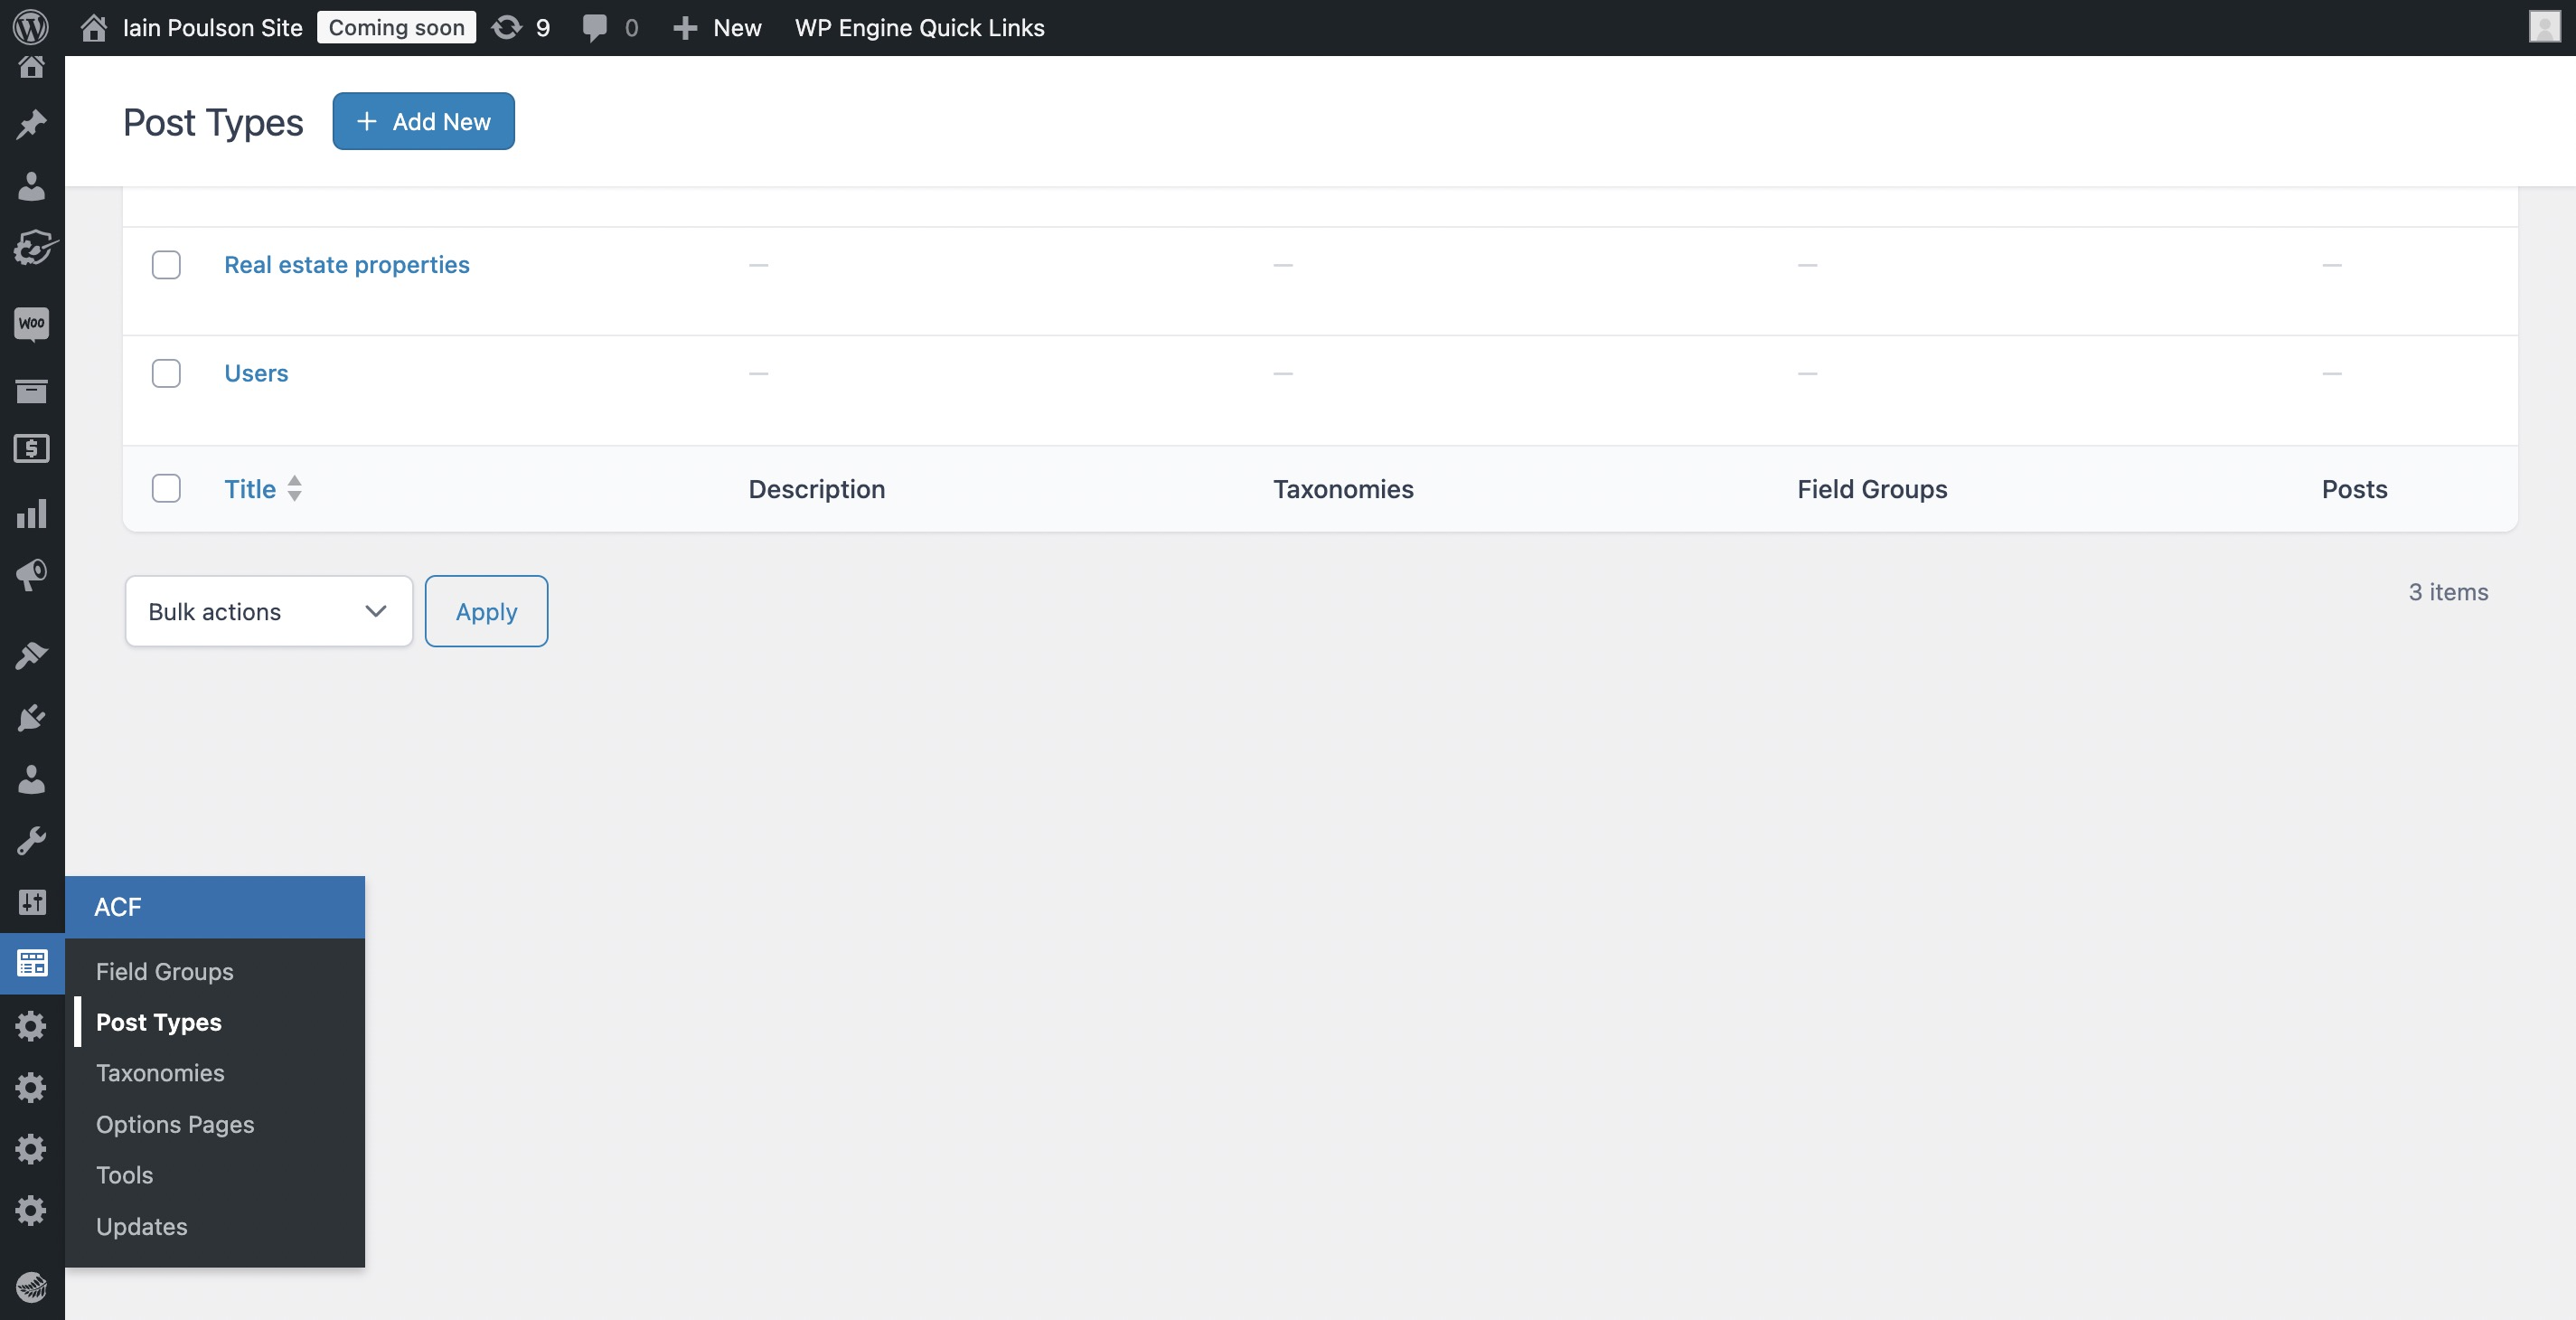
If Advanced Custom Fields is already installed on your site, you may not need CPT UI at all. Since ACF version 6.1, the plugin includes a built-in interface for registering custom post types and taxonomies — available in the free version, not just ACF PRO.
The workflow integrates CPT creation and field assignment into a single interface. After registering a post type through ACF > Post Types > Add New, you’re prompted to add field groups directly — skipping the back-and-forth between CPT UI and ACF that many developers previously dealt with. For a full breakdown of what ACF can do, see our Advanced Custom Fields guide.
ACF Post Types works best when:
- Your site already uses ACF for custom fields
- You want CPT creation and field configuration in one place
- You’re building a portfolio, events listing, or product catalog with rich structured data
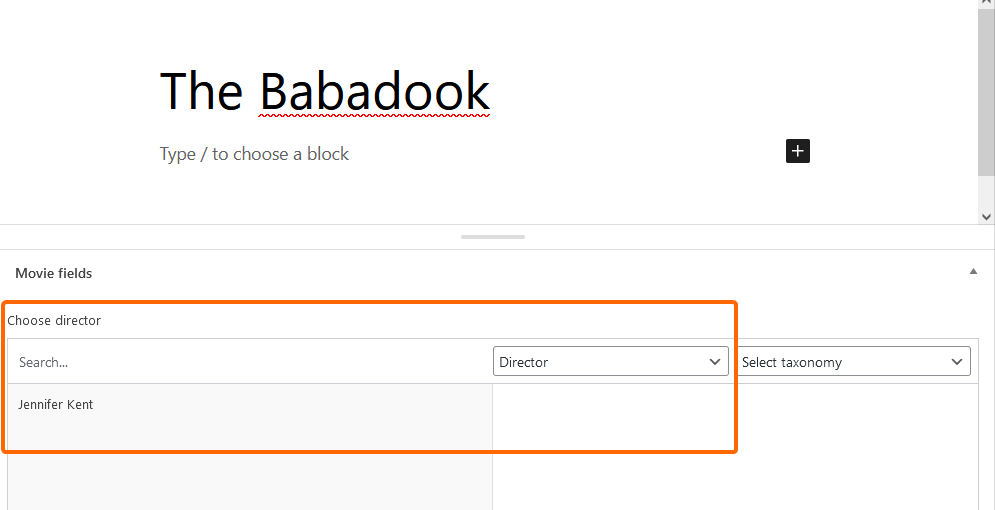
- You need relationship fields between content types (available in ACF PRO)
For bidirectional relationships between post types — where a “Books” post links to an “Author” and the Author post also shows all their books — ACF PRO adds a toggle in the relationship field settings that handles the sync automatically.

Comparing All Three Methods
Each method serves a different type of user. Here’s a consolidated look at how they stack up:
| Criteria | Code (PHP) | CPT UI Plugin | ACF Post Types |
|---|---|---|---|
| Requires coding | Yes | No | No |
| Free to use | Yes | Yes | Yes (basic) |
| Includes custom fields | Manual (custom code) | No (needs ACF/Pods) | Yes (built into ACF) |
| REST API / Gutenberg support | Manual (show_in_rest) |
Toggle in UI | Built-in |
| Works without a plugin | Yes | No | No |
| Import/export config | Manual | Yes (built-in) | Yes (JSON) |
| Relationship fields | Manual code | No | Yes (PRO) |
| Active installs | N/A | 1M+ | 2M+ (ACF total) |
| Best for | Developers | Site owners | ACF users |
Plugin install data: wordpress.org, March 2026
If you want to avoid a plugin dependency entirely, code is the only path. If you want the fastest setup without any PHP, CPT UI is the most straightforward option. If you need fields and CPTs in one tool, ACF is worth adding to your stack.
Adding Taxonomies and Custom Fields to Your CPT
A custom post type on its own only gives you a title and content editor. The real value comes when you pair it with taxonomies and custom fields — the combination turns a bare content structure into something genuinely organized and queryable. For a deeper look at how taxonomies work across WordPress, see our guide to WordPress taxonomies explained.
Custom Taxonomies
Taxonomies are grouping systems for your content. WordPress has two built-in ones — categories (hierarchical) and tags (flat). You can create new taxonomies specific to your CPT using register_taxonomy():
function my_register_project_type_taxonomy() {
    register_taxonomy(
        'project_type',
        'my_project',
        array(
            'label'        => 'Project Type',
            'hierarchical' => true,
            'show_in_rest' => true,
            'rewrite'      => array( 'slug' => 'project-type' ),
        )
    );
}
add_action( 'init', 'my_register_project_type_taxonomy' );
This creates a “Project Type” taxonomy that works like categories — hierarchical terms you can assign to each project entry. Both CPT UI and ACF have equivalent UI-based flows for creating taxonomies without code.
Custom Fields
Custom fields hold structured data that doesn’t fit in the standard title/editor. For a Projects post type, you might want a “Client Name” field, a “Project URL” field, and a “Completion Date” field.
Your main options for adding custom fields:
- Advanced Custom Fields (ACF) — Most popular, excellent UI, free for most use cases. 2M+ active installs.
- Pods — Free alternative that bundles CPT creation, custom fields, and relationships. 100,000+ installs. Good choice if you prefer a single plugin that does everything.
- Meta Box — Developer-focused, lightweight, with a free core and premium add-ons.
Displaying Custom Post Types in Your Theme
Registering a CPT makes it available in the database and admin. Displaying it well on the frontend requires understanding two things: which template files WordPress looks for, and how to query CPT entries in PHP. Our WordPress template hierarchy guide covers the full lookup order for all content types.
Template File Naming
WordPress follows a specific template hierarchy for custom post types. If your CPT has the slug project, WordPress looks for these template files in order:
- Single post view:
single-project.php→single.php→singular.php→index.php - Archive listing:
archive-project.php→archive.php→index.php
Creating archive-project.php and single-project.php in your theme (or child theme) gives you full control over how the content is presented. Without custom templates, WordPress falls back to your generic archive.php and single.php files.
For block themes using Full Site Editing, you can create templates for custom post types through the Site Editor under Appearance > Editor > Templates.
Querying Custom Post Types with WP_Query
To pull CPT entries into a page or widget, use WP_Query with the post_type argument:
$projects = new WP_Query( array(
    'post_type'      => 'my_project',
    'posts_per_page' => 6,
    'orderby'        => 'date',
    'order'          => 'DESC',
) );

if ( $projects->have_posts() ) {
    while ( $projects->have_posts() ) {
        $projects->the_post();
        // Template code here
        the_title( '<h3>', '</h3>' );
    }
    wp_reset_postdata(); // Always reset after a custom query
}
The wp_reset_postdata() call at the end is important — without it, other queries on the same page may return incorrect results. You can also filter by taxonomy terms by adding a tax_query argument to the query array.

Who Should Use Which Method?
The honest answer is that there’s no universally “right” method. The best choice depends on your role, your project, and how much ongoing maintenance you’re comfortable with.
✅ Best for non-developers and small business owners:
Start with the Custom Post Type UI plugin or ACF Post Types. Zero coding required, the UI matches what you’re used to in WordPress, and your content structure is portable across theme changes. If you need custom fields too, pair CPT UI with ACF or use ACF Post Types from the start.
✅ Best for WordPress developers building plugins or client sites:
Register CPTs in PHP using register_post_type() inside a custom plugin. This removes any plugin dependency and gives you complete control. The WordPress Plugin Handbook officially recommends this approach to keep content portable regardless of theme changes.
⚠️ Think carefully before registering CPTs in your active theme:
It works, but if you ever switch themes — or if a client does — the CPT disappears from the admin and your content structure breaks. Better to use a mu-plugin, a simple custom plugin, or a dedicated CPT plugin for anything you want to keep long-term.
❌ Avoid for permanent content structures:
Registering CPTs directly in a parent theme you don’t control. Updates to the parent theme can overwrite your changes.
Frequently Asked Questions
What is the difference between a WordPress post and a custom post type?
A standard WordPress post has a post_type value of “post” in the database. A custom post type uses a value you define (like “project” or “recipe”). Both store content the same way under the hood — the type value determines how they’re displayed, managed, and queried. Custom post types get their own admin menu section and their own URL structure.
How many custom post types can I have in WordPress?
There’s no hard limit imposed by WordPress itself. In practice, most sites have a handful of CPTs — WooCommerce alone registers several. The real consideration is organization: too many CPTs can make your admin cluttered. Use taxonomies to organize variations within a post type rather than creating a separate CPT for every content variation.
Can I create a custom post type without a plugin or code?
Not with core WordPress — you need either code or a plugin. There’s no built-in GUI in WordPress admin for creating CPTs. Both Custom Post Type UI and ACF Post Types (since version 6.1) provide free visual interfaces that require no PHP knowledge.
What is the show_in_rest parameter and why does it matter?
Setting show_in_rest => true in your register_post_type() arguments does two things: it exposes your CPT via the WordPress REST API (at /wp-json/wp/v2/your-slug), and it enables the Gutenberg block editor for that post type. If you’re registering a CPT without this argument and the block editor isn’t appearing, this is usually the reason. For more on how the REST API works in WordPress, see our WordPress REST API guide.
Do custom post types work with the Gutenberg block editor?
Yes, as long as you set show_in_rest => true when registering the post type. Without this, WordPress falls back to the classic editor for that post type. Both CPT UI and ACF Post Types handle this automatically when you enable the relevant toggle in their settings.
Can I query custom post types with WP_Query?
Yes. Pass the post type slug as the post_type argument in your query array: 'post_type' => 'my_project'. You can also use get_posts() for simpler queries. After any secondary WP_Query loop, call wp_reset_postdata() to avoid affecting other parts of the page.
What is the difference between CPT UI and Pods?
CPT UI focuses on post type and taxonomy registration — it’s deliberately simple and lightweight. Pods is a more comprehensive framework that bundles CPT creation, custom fields, relationships, and even templating in a single free plugin. CPT UI has over 1 million active installs; Pods has over 100,000. If you only need CPT structure, CPT UI is enough. If you want fields and relationships in one plugin without buying ACF PRO, Pods is worth considering.
Will I lose my custom post type data if I deactivate the plugin?
Your content data stays in the database — WordPress doesn’t delete it when a plugin is deactivated. However, without the plugin registering the post type, WordPress can’t display or manage those entries. They become inaccessible through the admin until the plugin is reactivated or the CPT is registered another way. This is one reason to keep your CPT registration consistent and document it.
How do I add a custom post type to a navigation menu?
Go to Appearance > Menus, and your custom post type should appear in the left panel as a menu source — both for individual entries and for the archive page (if you enabled has_archive). If it doesn’t appear, make sure show_in_nav_menus is set to true in your CPT arguments. This defaults to true when public is true, so most setups work automatically.
What is the 20-character limit for custom post type identifiers?
The post type slug you pass as the first argument to register_post_type() is stored in a database column that can hold a maximum of 20 characters. If your identifier is longer, WordPress silently truncates it — which can cause unexpected behavior. Keep identifiers short: acme_project (12 chars) works fine; acme_client_project (19 chars) is at the edge.
Conclusion
Custom post types are one of the most practical tools in WordPress. They let you move beyond the post/page limitation and build content structures that actually match what your site is about — whether that’s a portfolio, a staff directory, a recipe collection, or a product catalog.
The method you use matters less than making the right choice for your situation. Non-developers have two strong free options in CPT UI and ACF Post Types. Developers have the full power of register_post_type(). What’s consistent across all three: register CPTs in a plugin, not a theme, so your content structure stays intact through any redesign or rebuild.
Once your CPT is in place, layering on taxonomies and custom fields turns a basic content structure into something genuinely useful for managing and displaying structured information. That’s where custom post types go from a development curiosity to a core part of how your site works.